Difference between revisions of "Package Managers in Python"
| (2 intermediate revisions by the same user not shown) | |||
| Line 1: | Line 1: | ||
| − | |||
| − | |||
In data science working with various libraries, packages, tools and environments is essential. Package managers help streamline this process by allowing you to install, manage, and keep track of these software components. | In data science working with various libraries, packages, tools and environments is essential. Package managers help streamline this process by allowing you to install, manage, and keep track of these software components. | ||
| Line 51: | Line 49: | ||
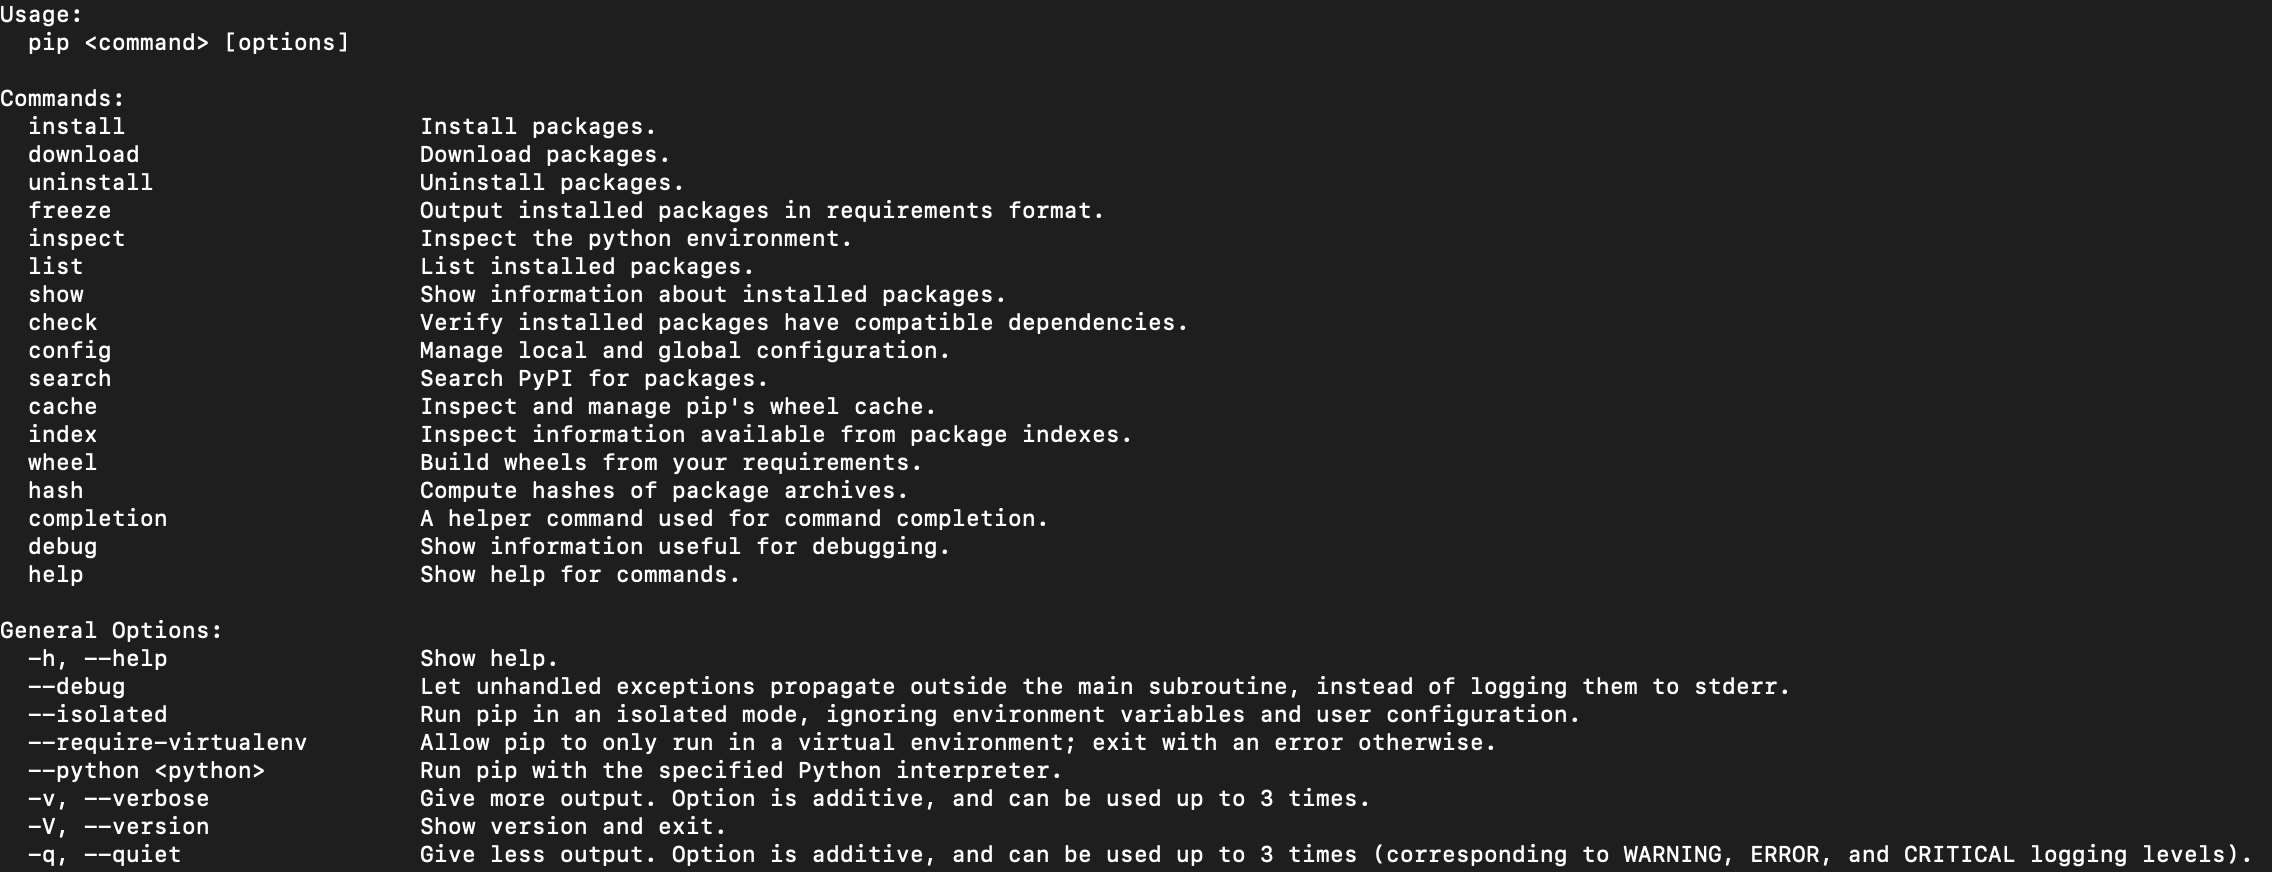
[[File:Pip 1.png|400px|frame|center|Pip basic commands. Source: Own elaboration]] | [[File:Pip 1.png|400px|frame|center|Pip basic commands. Source: Own elaboration]] | ||
| + | |||
| + | For an extensive guide on how to use pip, check the [https://pip.pypa.io/en/stable/user_guide/ pip documentation] | ||
=== Pip vs. Conda === | === Pip vs. Conda === | ||
Both pip and Conda are valuable tools for data science, but the best choice depends on your specific needs. While pip is great for general Python packages, it might not be ideal for data science specifically because it doesn't includes many specialized data science libraries. That is why, conda is preferred. Conda offers a wider range of scientific computing libraries and excels at managing complex environments. If you're working on data science projects that require specialized tools and version control, Conda might be a better fit. Ultimately, it is very common to utilize both tools. Pip can manage core Python functionalities, while Conda takes care of the data science-specific environment and its extensive libraries. | Both pip and Conda are valuable tools for data science, but the best choice depends on your specific needs. While pip is great for general Python packages, it might not be ideal for data science specifically because it doesn't includes many specialized data science libraries. That is why, conda is preferred. Conda offers a wider range of scientific computing libraries and excels at managing complex environments. If you're working on data science projects that require specialized tools and version control, Conda might be a better fit. Ultimately, it is very common to utilize both tools. Pip can manage core Python functionalities, while Conda takes care of the data science-specific environment and its extensive libraries. | ||
| + | |||
| + | == References == | ||
| + | |||
| + | * Miniconda documentation: https://docs.anaconda.com/miniconda/ | ||
| + | * Miniforge documentation: https://conda-forge.org/ | ||
| + | * Conda documentation: https://docs.conda.io/projects/conda/en/stable/index.html | ||
| + | * Pip documentation: https://pip.pypa.io/en/stable/ | ||
Authors: Gustavo Rodriguez | Back to page: [[Setting up Python Work Environment]] | Authors: Gustavo Rodriguez | Back to page: [[Setting up Python Work Environment]] | ||
| + | |||
| + | [[Category: Python]] [[Category: Python Setup]] | ||
Latest revision as of 21:36, 14 September 2024
In data science working with various libraries, packages, tools and environments is essential. Package managers help streamline this process by allowing you to install, manage, and keep track of these software components.
Contents
Package Manager Installers
Python distributions such as Anaconda are not the only way for getting started with Python and data science. Miniconda and Miniforge are lightweight alternatives that focus solely on the Conda package manager. While Anaconda requires more than 4 GB of disk space, Miniconda and Miniforge need only ~400 MB. This is because these package manager installers are less complex in their construction, for example, they don't have built-in integrated development environments (IDE); however, in order to use them properly, you have to learn the basics of command line tools (CLI) and getting familiarized with the computer's terminal.
Miniconda
It is the free minimal installer of conda, Python and other basic packages such as pip. It also provides the core conda functionality for creating and managing environments without the pre-installed packages that come with Anaconda. This makes it a good choice if you already know which packages (and their versions) you need for certain projects. Miniconda uses the Anaconda's channel to retrieve libraries and packages, and is free to use for individuals and small organizations. If you are unsure whether use Anaconda or Miniconda, check this page: "Should I use Anaconda Distribution or Miniconda?"
To install Miniconda using a Graphic User Interface (GUI) follow the steps indicated here: Miniconda installation (GUI) . If you prefer use the terminal, check Minconda installation (CLI)
Miniforge
Built on top of Miniconda, Miniforge is Python installer uses the conda-forge channel by default and not Anaconda's. Conda-forge is an open community-driven repository known for its extensive collection of scientific Python packages. To install Miniforge you need to go to Miniforge download's page and select the installer according to your device or to use the CLI (only for MacOs and Linux devices). For detailed instructions regarding its download and installation, read the conda-forge github repository.
Miniconda vs Miniforge
Now you are probably wondering, which one to use. For a straightforward decision, consider that Miniforge is more suitable for ARM computer architectures (e.g., Apple M1-M4 or Snapdragon's processors) than x86 architectures (e.g., Intel processors). In this sense, if you have Macbook Air M2, you will have a better performance with Miniforge. Moreover, conda-forge channel contains a more curated and updated set of packages. This doesn't mean is not a good option, it is certainly a good option if you are used or prefer the Anaconda ecosystem and don't mind about the specific advantages of conda-forge.
Package managers
After having installed either Anaconda, Miniconda or Miniforge, now you will have Python and Conda package manager installed in your computer. You can check the installion by typing python --version and conda --version in your terminal computer. To open a terminal on windows, press CTRL + R, type cmd. exe and press enter. On macOS, open launcher and type terminal into the search box, clicking the icon when it appears.
Verifying Python:
(base) user91@mydevice ~ % python --version
You should get something like:
Python 3.12.3
Verifying conda:
(base) user91@mydevice ~ % conda --version
You should get something like:
conda 24.7.1
Note that (base) appears in your terminal before your user name, which means that your computer hosts the conda base virtual environment. However, it is not recommended at all to install other packages or start projects in this base environment. Conda will help you to create isolated virtual environments for your different projects. For more information about environments, check this entry.
Conda
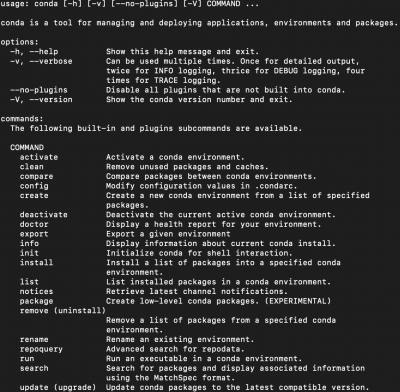
Conda is a command line tool used in a terminal to interact with Anaconda's or conda-forge repositories. It is a package and environment management software. It can be used to install or update packages, create, save and load environments. To start using conda, open the terminal, type conda and press enter. You will see something like this:
On the image on your left, you see the basic commands of conda, such install, create, activate, deactivate, remove. For example, the command install serves to install packages; the command create is used to create a new virtual environment. A more detailed use of the commands can be found in conda documentation.
Pip
Pip is the official package installer and manager for Python. It's a simple and widely used tool that comes bundled with most Python installations (Python 3.3 onwards), that is, pip comes with the installation of Anaconda/Miniconda/Miniforge. Pip connects to the Python Package Index (PyPI), a vast repository containing thousands of free and open-source Python packages for various purposes. Similar to conda, pip automatically downloads and installs any dependencies required by the package you're installing, easily update packages to their latest versions, and can be used within virtual environments to isolate project dependencies.To start using pip, open the terminal, type pip and press enter. You will see something like this:
For an extensive guide on how to use pip, check the pip documentation
Pip vs. Conda
Both pip and Conda are valuable tools for data science, but the best choice depends on your specific needs. While pip is great for general Python packages, it might not be ideal for data science specifically because it doesn't includes many specialized data science libraries. That is why, conda is preferred. Conda offers a wider range of scientific computing libraries and excels at managing complex environments. If you're working on data science projects that require specialized tools and version control, Conda might be a better fit. Ultimately, it is very common to utilize both tools. Pip can manage core Python functionalities, while Conda takes care of the data science-specific environment and its extensive libraries.
References
- Miniconda documentation: https://docs.anaconda.com/miniconda/
- Miniforge documentation: https://conda-forge.org/
- Conda documentation: https://docs.conda.io/projects/conda/en/stable/index.html
- Pip documentation: https://pip.pypa.io/en/stable/
Authors: Gustavo Rodriguez | Back to page: Setting up Python Work Environment

